
A garage often becomes the place where forgotten boxes, misplaced tools, and half-finished projects pile up. Before long, you cannot park a car, find a screwdriver, or reach the shelf you need. Knowing how to clean out a garage turns that crowded space into somewhere you can actually use, and it makes everyday items easier to find. Successful garage cleaning takes more than throwing things away. It takes decisions about what belongs, where it should live, and how to keep it that way.
This guide walks through the full process: preparing the space, sorting belongings, decluttering, cleaning surfaces and floors, and creating practical storage zones. The goal is a garage that stays functional instead of filling up again a few months later. Start with the preparation stage, because a little planning makes every later step easier.
What to Know Before You Start a Garage Cleanout
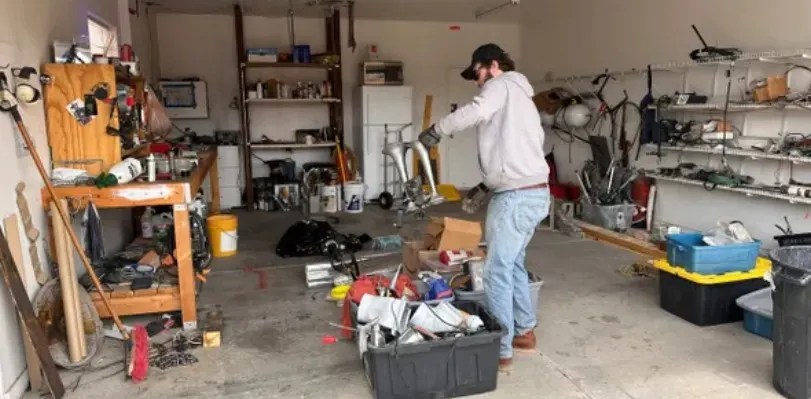
Before you carry anything out, decide how much of the garage you can realistically handle in one session. Pulling everything onto the driveway feels productive, but it can leave you with a bigger mess if rain arrives or the day runs out. Check the weather, choose a block of time you can protect, and decide where sorted items will wait temporarily, such as a tarp on the driveway, a spare room, or a corner of the yard.
Safety matters as much as space. Garages often hold heavy boxes, sharp tools, paint, chemicals, and old equipment, so wear gloves and closed shoes, and lift with your legs. If the garage is packed floor to ceiling or you cannot move heavy items safely, a professional garage cleanout service from Judy Maids can handle the heavy lifting while you make the keep-or-remove decisions. Good garage cleaning and garage cleanup both begin with a clear plan, and garage decluttering goes faster when you know your time, supplies, and staging area before you start.
The essentials to have ready are trash bags, sturdy boxes, gloves, a broom, cleaning supplies, and a designated spot for temporary storage.
How to Build a Complete Garage Cleanout Checklist
A garage cleanout checklist keeps the job from feeling endless. Breaking the work into preparation, sorting, cleaning, and organization lets you see exactly what comes next. It also works as a garage organization checklist you can return to whenever the space starts slipping again.
Gather Supplies Before Starting the Garage Cleanup
Having the right supplies close by keeps you from stopping halfway to hunt for a roll of bags. Collect heavy-duty trash bags, empty boxes, work gloves, a marker, labels or masking tape, a broom, a dustpan, and basic cleaning products. Sturdy boxes and clear labels make moving and sorting simpler, and gloves protect your hands from splinters, rust, and grime.
Divide the Garage Into Manageable Work Zones
Split the garage into sections such as the left wall, the back corner, the workbench, and the floor near the door. Working one zone at a time keeps the job from becoming overwhelming, and each finished zone shows visible progress. It also stops you from shifting clutter from one side of the garage to the other.
Set Sorting Categories Before Moving Items Around
Decide your categories before you touch a single box. Keep, donate, sell, recycle, dispose, and relocate cover nearly everything you will find. When every item has a category waiting for it, decisions become quicker and more consistent, and you avoid creating a large “maybe” pile that never gets resolved.
Sort Garage Items Before You Start Organizing
Sorting has to come before shelves, bins, and hooks. Buying storage products first usually means you organize clutter instead of removing it. Simple garage cleanout tips for homeowners tend to share one rule: decide first, buy later.
Begin by removing what clearly does not belong. Duplicate items, broken belongings, dried-up paint, rarely used possessions, and forgotten seasonal decorations are common culprits. Useful tools and items you use regularly are the ones that deserve prime space. When you pick something up, ask yourself a few honest questions. Have I used this in the past year? Is it still in working condition? Do I own another one that does the same job? Would this be safer or better stored somewhere else in the house? If the answers point toward no, it belongs in one of your removal categories.
How to Decide What Should Stay in Your Garage
Keep-or-remove decisions get easier when you judge each item by how often you use it, what condition it is in, how much room it takes, and whether the garage is a safe place for it. Available storage matters too. If an item only fits by blocking something you use weekly, it probably needs a different home.
Keep Items You Use for Home and Garage Tasks
Tools, maintenance supplies, outdoor equipment, and practical household items that you reach for regularly deserve easy-to-reach storage. A hammer, a hose, a ladder, or a bag of lawn supplies earns its spot because it solves real problems around the house. Keep these within arm’s reach, not buried behind boxes.
Remove Broken, Duplicate, or Forgotten Belongings
Damaged items, extra duplicates, and possessions that have gone untouched for years take up space without giving anything back. A third rusty wrench set or a cracked storage tub is unlikely to be missed. Removing these belongings creates room and makes what remains easier to see.
Move Items That Do Not Belong in Garage Storage
Some belongings are better off indoors. Photos, important documents, electronics, and fabric-based keepsakes can suffer in garages where temperatures swing and moisture builds up. Certain products, such as paint, fuel, and cleaning chemicals, also need careful storage because of safety concerns. Relocate anything that is sensitive to heat, cold, or dampness, or that you need to access often in the house.
Simple Steps for Decluttering a Crowded Garage
Once your categories are clear, decluttering becomes a workflow instead of a guessing game. Working in order helps you avoid decision fatigue, which is the tired, everything-looks-the-same feeling that leads people to keep too much. The steps below answer the common question of how to declutter a garage without just moving clutter from place to place.
Clear One Garage Section Before Starting Another
Finish one zone completely before you move to the next. When a shelf, corner, or wall is sorted and clear, you can see real progress, which keeps motivation up. Piles are also less likely to spread across the floor and block the areas you have already finished.
Create Separate Piles for Keeping and Removing Items
Set up distinct piles or boxes for what stays and what leaves. Use one for items being kept, and separate ones for donation, recycling, disposal, and relocation. Clear categories mean you make each decision once, and nothing needs to be sorted a second time.
Finish Decluttering Before Buying New Storage
New bins and organizers are tempting, but buying them too early can simply hide unnecessary clutter in nicer containers. Wait until you know exactly what you are keeping. Then measure your space and choose storage that fits the items you own, not the ones you might have owned.
How to Group Garage Tools and Items for Storage
After decluttering, grouping similar belongings makes the garage far easier to use. When all your hand tools sit together, all your gardening equipment sits together, and all your sports gear shares a space, you stop wasting time hunting through the whole garage for one item. Good garage organization is really about keeping like things with like things.
Useful groupings include hand tools and power tools, gardening and lawn equipment, sports and outdoor gear, automotive supplies, seasonal decorations and belongings, and household maintenance items such as light bulbs, batteries, and cleaning supplies. Keep the groups you use most often near the door or at waist height, and place rarely used ones higher or farther back. Homeowners who feel stuck at this stage sometimes benefit from home organization support that builds categories around how the household actually lives.
Garage Storage Ideas That Create More Usable Space
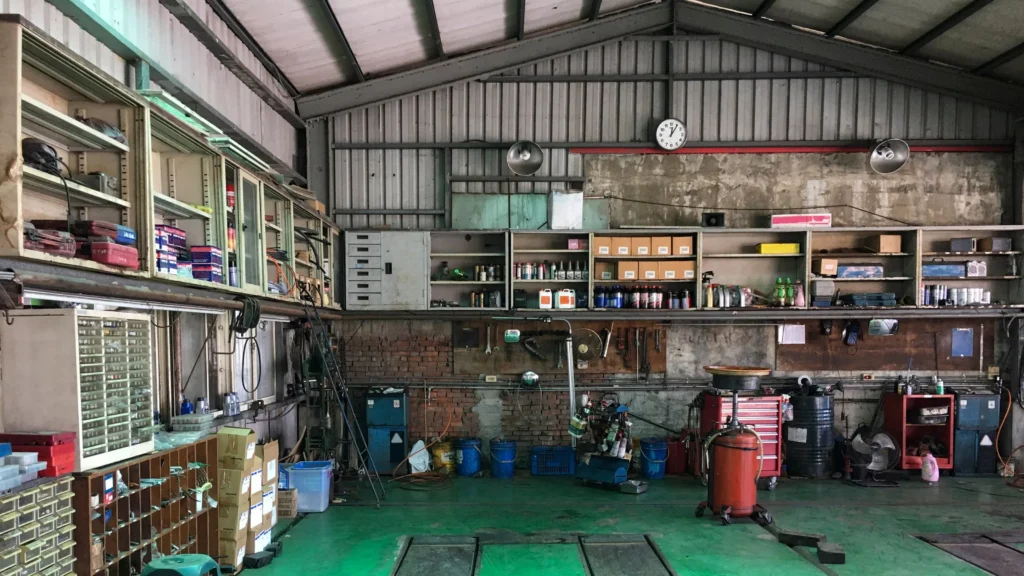
With the clutter gone, the next step is turning the cleared floor into storage that works. The trick is to use walls and overhead space first, so the floor stays open for cars, workbenches, or projects. Planning organized garage storage around vertical space keeps everyday items visible and prevents the floor from filling back up.
Several garage storage ideas work well together. Wall-mounted racks and hooks hold ladders, bikes, and long-handled tools. Sturdy shelves along one wall handle boxes and bins, while closed cabinets keep chemicals and small items out of sight and out of reach of children. Overhead racks can hold seasonal items you only need once or twice a year. Whatever you choose, leave a clear path and keep the items you use weekly in the most accessible zones.
How to Use Shelves and Storage Bins More Effectively
Shelves and storage bins only help when you can find and reach what is inside them. Group items by type and by how often you use them, so daily-use items sit at eye level and occasional items go higher or lower. Clear bins let you see contents at a glance, and labels on every side mean you never have to pull a box down just to check it.
Weight matters as well. Put heavier boxes on lower shelves so they are safer to lift and less likely to cause a shelf to fail, and keep lighter bins up high. Leave a little space between bins so you can slide one out without moving three others. For seasonal items, use a dedicated shelf or overhead area, and rotate what is easy to reach when the seasons change. Avoid stacking bins so high that the bottom one becomes impossible to open.
Best Ways to Clean Garage Floors and Surfaces
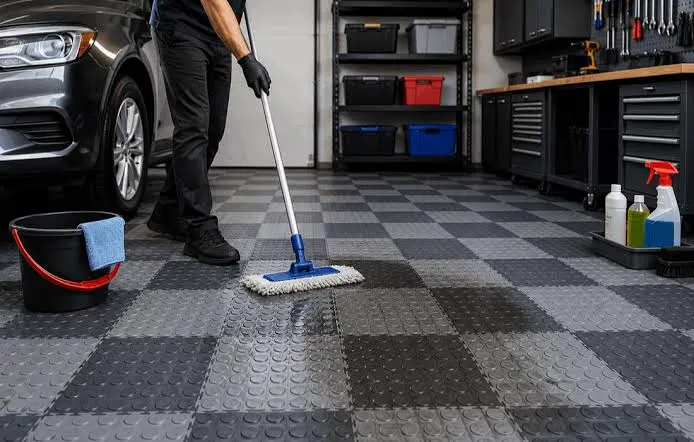
Cleaning works best after the clutter is gone, because you can finally reach the floor, walls, and corners. Think of this as your garage cleaning guide for the final reset. Start by sweeping loose dirt and debris toward the door, then use a vacuum, ideally a shop vacuum, to pick up fine dust from corners and along the edges. Wipe down walls, shelves, and work surfaces before you put anything back, because dust from above will otherwise settle on the floor you just cleaned.
Spills and stains need targeted attention. Oil, grease, and paint spots respond best to a cleaner made for that specific mess, applied and scrubbed according to the product directions. For general floor cleaning, mop with a mild cleaner suited to your floor type and let it dry fully before you return any items. For a thorough reset, a deep cleaning checklist can help you cover corners, baseboards, and door tracks that regular sweeping misses. Focus first on dust removal, then spot cleaning, then a full floor wash, and finally wipe the surfaces you use most.
How to Handle Unwanted Items After Garage Sorting
Once you have separated the items you no longer want, they need a real exit plan. Otherwise, the pile just moves from the garage to the driveway or living room. Each category has its own path, and handling them promptly keeps the cleanout from stalling.
Separate Items for Donation, Sale, and Recycling
Condition and usefulness decide where each item goes. Working tools, sports gear, and furniture in good shape can be donated or sold, while clean, unused items make the best donations. Cardboard, scrap metal, and certain plastics can often go to recycling. Check with your local donation center or recycling facility for what they accept before you load the car.
Dispose of Damaged and Unusable Items Responsibly
Broken materials and hazardous products such as paint, motor oil, batteries, and chemicals should not go into regular trash. Many communities across the United States have household hazardous waste programs or drop-off days, so check your local rules before disposal. Handling these items properly protects your household, your neighbors, and the environment.
Remove Sorted Items Promptly From the Garage
Try to take donations, recycling, and trash out within a day or two of sorting. Bags and boxes left behind quickly turn into the same clutter you just cleared. Schedule a donation drop-off, a dump run, or a pickup before you begin, so the removal stage has a firm date.
Garage Cleanup Mistakes That Waste Time and Space
A few common errors make garage cleanouts harder and let clutter return. Here is what to watch for, and how to fix each one.
- Organizing before decluttering: Buying shelves and bins first only rearranges the mess. Sort and remove unwanted items before you shop for storage.
- Keeping everything “just in case”: This fills space with items you will likely never use. Set a simple rule, such as removing anything unused for a year, unless it is seasonal or essential.
- Buying too many containers: Extra bins can hide clutter and take up valuable space. Buy only what you need after you know what you are keeping.
- Blocking frequently used items: Putting daily tools behind rarely used boxes wastes time. Place everyday items in front and at easy-reach height.
- Ignoring floor cleaning: Skipping this leaves dust and stains under your newly organized space. Sweep, vacuum, and wash the floor before returning anything.
How to Keep Your Garage Clean and Organized Long Term
A clean garage stays that way through small, steady habits. Returning tools to their designated spots right after use prevents the slow drift back into clutter. Short mini-decluttering sessions every few months catch small piles before they grow, so you never face a full cleanout again. It also helps to check storage bins now and then, keep the floor clear, and review seasonal items when the weather changes.
A simple maintenance checklist keeps this manageable:
- Put tools and supplies back in their assigned zones after each use.
- Do a quick 15-minute tidy every month or two.
- Check bins and shelves for damage, moisture, or overcrowding.
- Sweep the floor and clear any items left on the ground.
- Review seasonal belongings twice a year and remove what you no longer need.
Garage Cleanout Ideas for Different Storage Needs
Every garage serves a different purpose, so the best organization system depends on how yours is used. Start by deciding what the space needs to do most often, then protect enough floor space for that priority. These garage cleanout ideas can help you match the setup to your daily habits.
If the garage mainly holds vehicles, keep walls and overhead racks for storage so both cars have room to park and doors can open fully. For a tool-heavy garage, a sturdy workbench with Pegboard or wall-mounted tool storage keeps everything visible and within reach. Hobby-focused spaces work well with labeled shelves and cabinets that keep supplies and unfinished projects tidy. Seasonal storage does best with overhead racks and clear, labeled bins on higher shelves. If the garage doubles as household storage, Judy Maids can help keep the space clean and organized by addressing dust, dirt, and buildup around storage areas. Dedicate one wall to bins for overflow items and keep a clear path so nothing gets buried.
Final Thoughts on Creating a Cleaner, Organized Garage
A successful garage cleanout follows a clear order. You prepare the space, sort your belongings, declutter with firm categories, clean the floors and surfaces, and only then build storage that fits what you own. Removing unwanted items before organizing is the step that makes everything else work, because storage systems only help when they hold things worth keeping.
Shelves and storage bins are most useful when they are labeled, easy to reach, and matched to how often you use each item. Keeping floors and surfaces clean helps the garage feel finished and makes small messes easier to spot before they build up. Above all, adapt your system to your actual storage needs and daily habits, because the best setup is the one you will maintain. Pick one garage zone today, work through the checklist step by step, and let each finished section build the momentum for the next.
How to Clean Out a Garage: FAQs and Helpful Tips
Even with a solid plan, a few questions tend to come up before or during a garage cleanout. The answers below cover timing, sorting, storage, and upkeep. They are meant to help you handle the practical details as you work.
It depends on the size of the garage and how much has built up. A lightly cluttered one-car garage may take a day, while a packed or larger garage can take a full weekend or longer. Working in zones lets you spread the job across several shorter sessions.
Start with obvious trash, broken items, and anything that clearly does not belong, such as empty boxes and expired products. Removing these first opens up floor space and makes the remaining sorting easier.
Group tools by type and use, then store them where you can see and reach them. Wall-mounted racks, pegboards, and a labeled toolbox or cabinet all work well. Keep the tools you use most at waist or eye level.
A quick tidy every month or two and a fuller review once or twice a year is enough for most households. Regular short sessions prevent the buildup that leads to a major cleanout.
Clear, labeled bins on high shelves or overhead racks suit seasonal items well. Keep them out of the main traffic areas, and rotate them forward when the season changes.